
Personalized Water Bottle Step-by-Step Guide
8/2/20261 min read
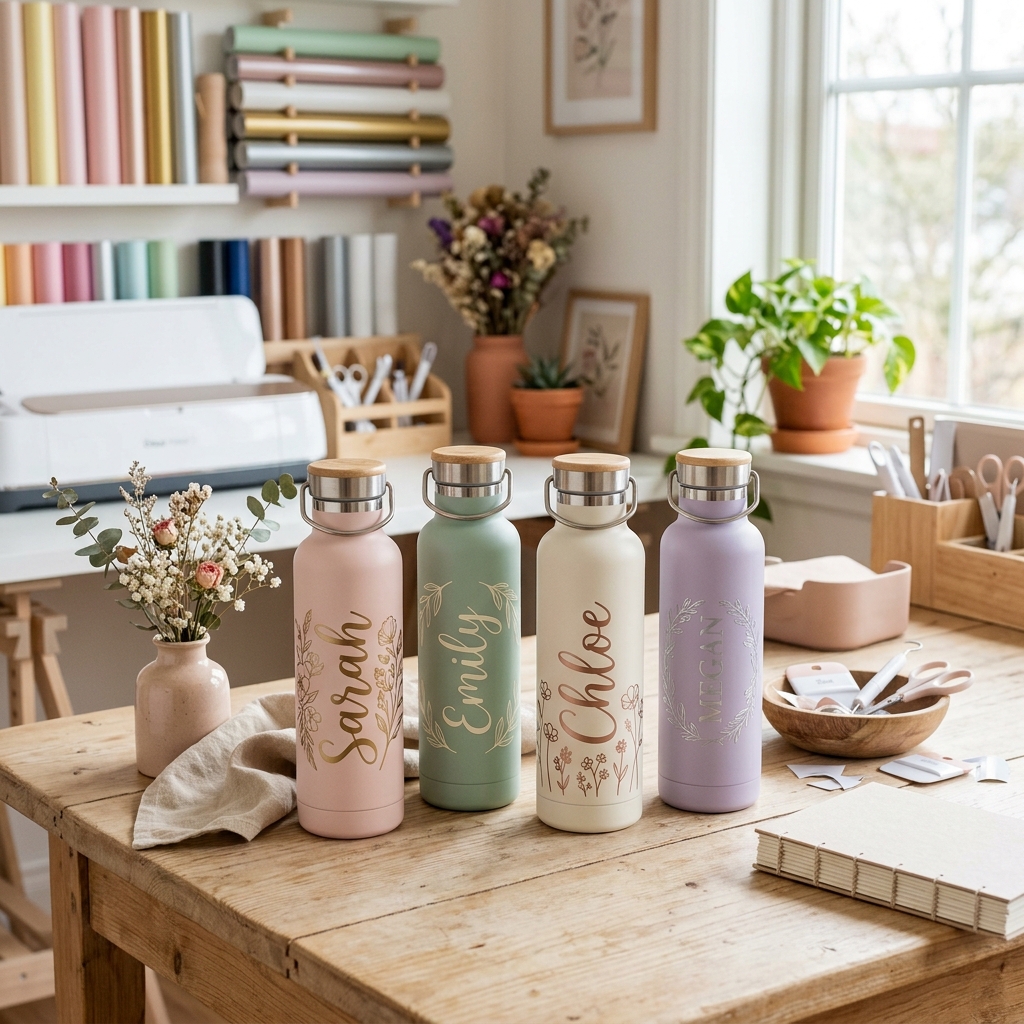

Are you looking to add a touch of personal flair to your hydration routine? A personalized water bottle is not only practical but also meaningful! It’s an easy way to make your bottle stand out at school, work, the gym, or during sports activities. Additionally, creating one makes a thoughtful personalized gift for birthdays, Christmas, teachers, friends, family members, or coworkers. Let’s jump into how to make your very own personalized water bottle using your Cricut!
Supplies You'll Need
Permanant adhesive vinyl
Cutting machine (Cricut, Silhouette Cameo, Brother ScanNCut)
Step-by-Step Tutorial
Clean the water bottle: Start by removing any dust, fingerprints, and grease from the surface. This ensures the vinyl will adhere properly without any issues.
Create your design: Open Cricut Design Space to create or upload your design. Choose a font or graphic that reflects your personal style.
Cut the vinyl: Load your vinyl onto the cutting mat. Make sure to select the correct material setting before cutting your design.
Weed the design: Carefully remove the excess vinyl, leaving only your desired design intact on the backing paper.
Apply transfer tape: Place transfer tape over your design to pick it up, ensuring there are no air bubbles.
Position the design: Take your time aligning the design perfectly on the water bottle before applying it.
Apply the vinyl: Smooth the vinyl down onto the bottle using a scraper or even a credit card, then slowly peel off the transfer tape.
Let it cure: Allow your vinyl design to sit for at least 24 hours before washing or using the bottle to ensure a strong hold.
Tips for the Best Results
Use permanent adhesive vinyl for lasting results.
Make sure the bottle is clean and dry.
Choose easy-to-read fonts for clarity.
Measure your design before cutting to fit perfectly.
Avoid putting the water bottle in the dishwasher to preserve your design.
Happy crafting!
Made with Creativity
Boutique-grade handmade ideas, Cricut tutorials, and curated crafting guides.
Explore
Home
Blog
Cricut
DIY Projects
Tools
Say Hello
willar@madewithcreativity.com
Pinterest: @madewithcreativity
Affiliate Disclosure: We earn from qualifying purchases.
© 2026 Made with Creativity-Curated Cricut tutorials and Craft Inspiration
Boutique-grade handmade inspiration