
Personalized Vase Step-By-Step Guide
8/4/20262 min read
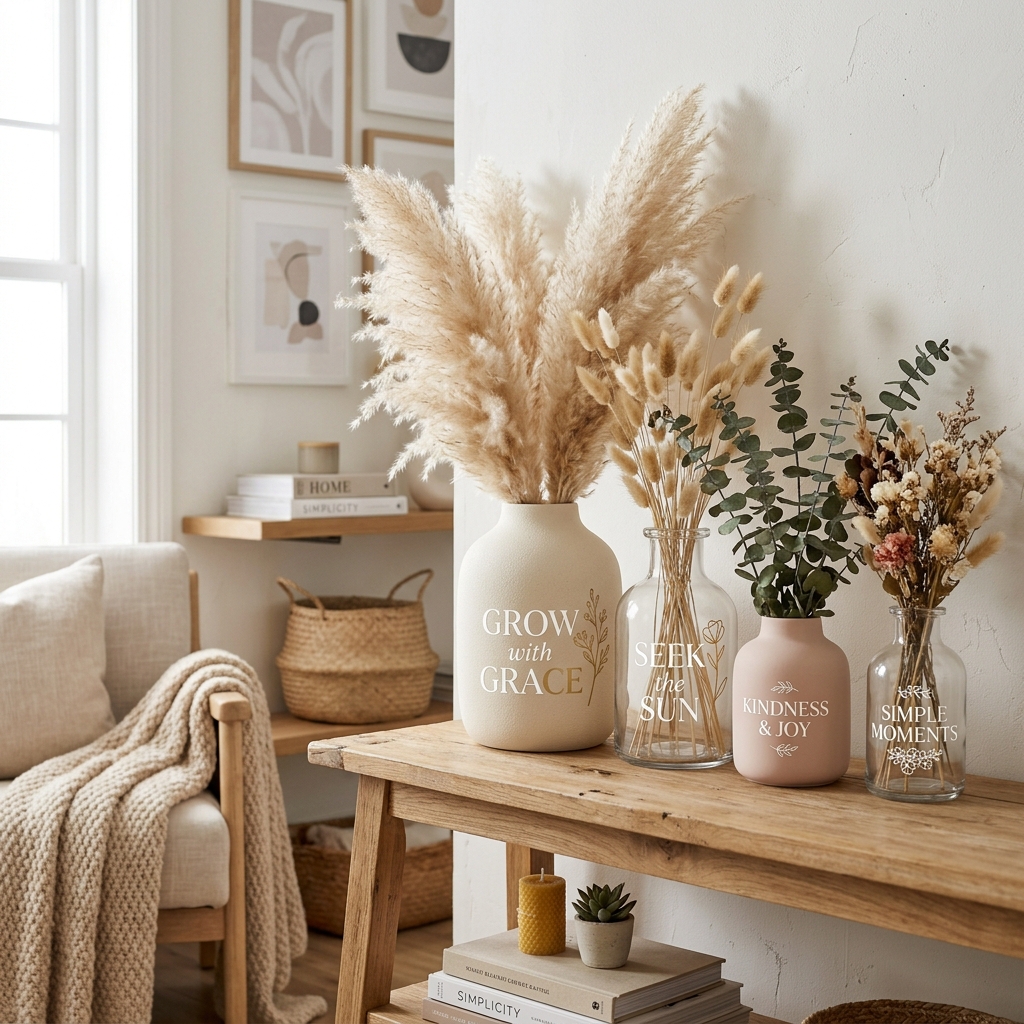
A personalized vase is not just a decorative item; it is a meaningful and elegant addition to your home. By customizing a vase with names, initials, quotes, or botanical designs, you create a timeless piece that is perfect for any occasion—from birthdays and weddings to Mother’s Day and housewarmings. Not only does a custom vase make for a memorable gift, but it also brings a stylish personal touch to any room.
Supplies You'll Need
Permanant adhesive vinyl
Cutting machine (Cricut, Silhouette Cameo, Brother ScanNCut)
Step-by-Step Tutorial
Clean the vase: Before you start, it’s important to thoroughly clean the vase using rubbing alcohol or glass cleaner. This step removes dust, fingerprints, and oils to ensure a better grip for the vinyl.
Create your design: Open Cricut Design Space or your preferred cutting machine software. You can either create your own design or upload one. Think about names, monograms, floral illustrations, or inspirational quotes that resonate with you.
Cut the vinyl: Place your permanent adhesive vinyl onto the cutting mat, ensuring it sticks well. Select the right material setting on your cutting machine and cut your design.
Weed the design: Carefully remove the excess vinyl from your design, being careful to leave the desired shape intact. This is where patience pays off!
Apply transfer tape: Cut a piece of transfer tape and place it over your vinyl design. Smooth out any air bubbles to ensure a clean transfer.
Apply the design to the vase: Position your vinyl design on the cleaned vase. Use a scraper or a credit card to apply pressure and adhere the vinyl. Slowly peel away the transfer tape to reveal your design.
Let the vinyl cure: For the best results, allow the vinyl to cure for at least 24 hours before cleaning or using the vase.
Tips for the Best Results
Clean the vase thoroughly before applying vinyl.
Choose simple and elegant designs.
Measure the vase before creating your design.
Apply the vinyl slowly to avoid wrinkles and bubbles.
Allow the vinyl to cure for at least 24 hours.
Hand wash the vase if needed to protect the design.
Feel free to experiment with different fonts, floral designs, and colors to craft a vase that suits every occasion. Happy crafting!
Made with Creativity
Boutique-grade handmade ideas, Cricut tutorials, and curated crafting guides.
Explore
Home
Blog
Cricut
DIY Projects
Tools
Say Hello
willar@madewithcreativity.com
Pinterest: @madewithcreativity
Affiliate Disclosure: We earn from qualifying purchases.
© 2026 Made with Creativity-Curated Cricut tutorials and Craft Inspiration
Boutique-grade handmade inspiration